In this document, we’ll show you how to use the HTML Code block and share with you some basic HTML and CSS tricks that you can use to customize your forms.
Please note that this is an advanced feature and does require knowledge of CSS and HTML. If you are not familiar with HTML or CSS, we recommend working with a member of your team who is. There are also several great resources out there where you can learn HTML and CSS such as this one.
HTML
The HTML block allows you to add text with embedded links to your inline form. You may want to use this if you wish to link contacts to a video or privacy policy page on your site. You can also format the text as well as its alignment in this specific block.
Please note that the HTML block can only be used on inline forms. Float box, floating bar, and modal forms do not have the option to add an HTML block.
Adding the HTML Code block to your form
To get started, simply drag and drop the “HTML Code” block to any place on your form. This block is located under the Fields > Standard: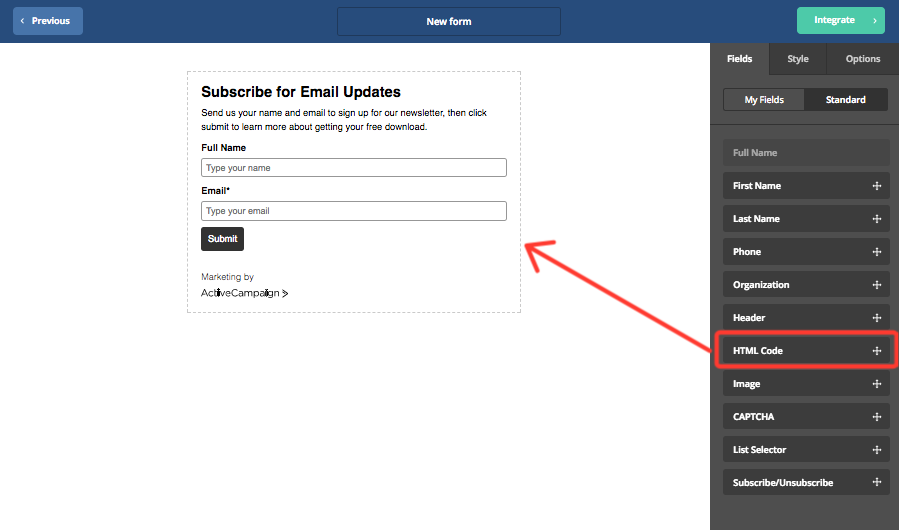
To add your custom HTML, click that HTML Code block in your form. Once you do, you will be able to enter your code into the box on the right side of your screen: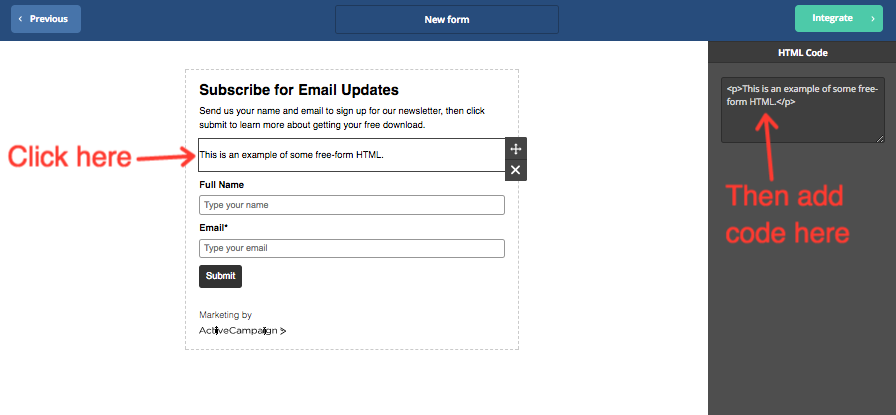
Now you’re ready to add your own HTML to your form.
Basic HTML Code
You can use the following to add styling to the text in your HTML Code block.
Center text
Tags used: <center> </center>
In this example, we placed the text we wanted centered in between the two tags. This is how we set it up:
<center>Send us your name and email to subscribe to our newsletter.</center>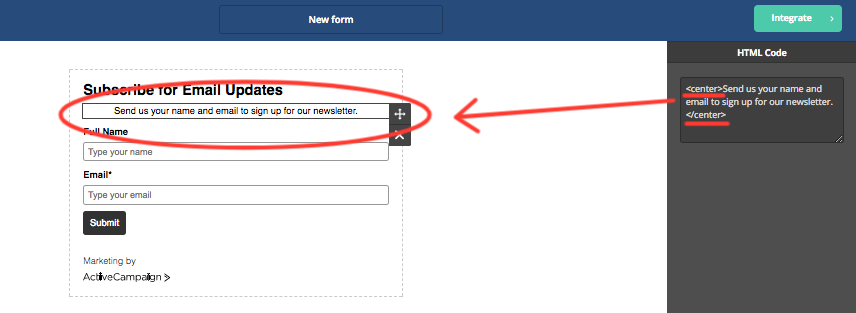
Add line break
Tags used: <p> </p>
In this example, we added a link break between two sentences in our HTML block. This is how we set it up:
Send us your name and email to sign up for our newsletter. <p>Don't forget to add us to your contact list!</p>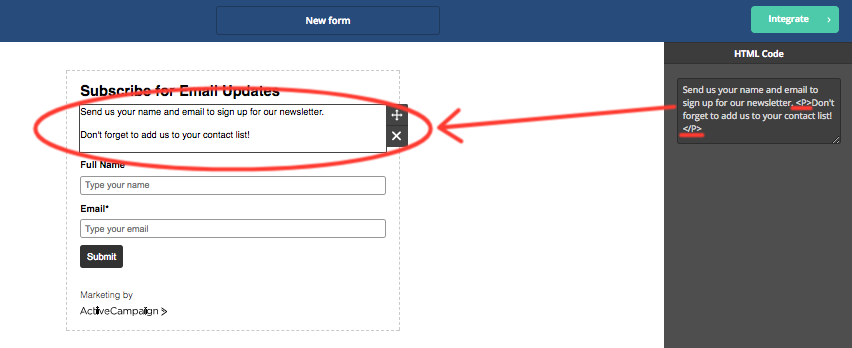
Bold Text
Tags used <b> </b>
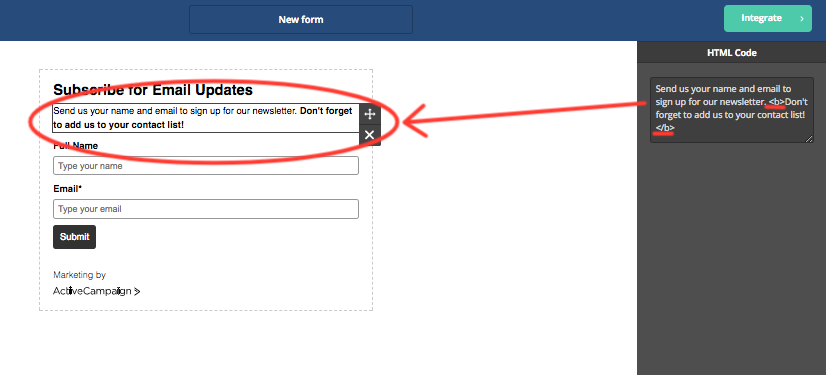
In this example, we wanted to bold a sentence in our HTML block. This is how we set it up:
Send us your name and email to sign up for our newsletter. <b>Don't forget to add us to your contact list!</b>
Underline text
Tags used <u> </u>
In this example, we wanted to underline a sentence in our HTML block. This is how we set it up:
Send us your name and email to sign up for our newsletter. <u>Don't forget to add us to your contact list!</u>
Add link
Tags used <a href> </a href>
In this example, we wanted to add a link to our privacy policy for subscribers to click on. This is how we set it up:
Send us your name and email to sign up for our newsletter. <a href="https://www.yourwebsite.com/privacy-policy/">Read our privacy policy here.</a>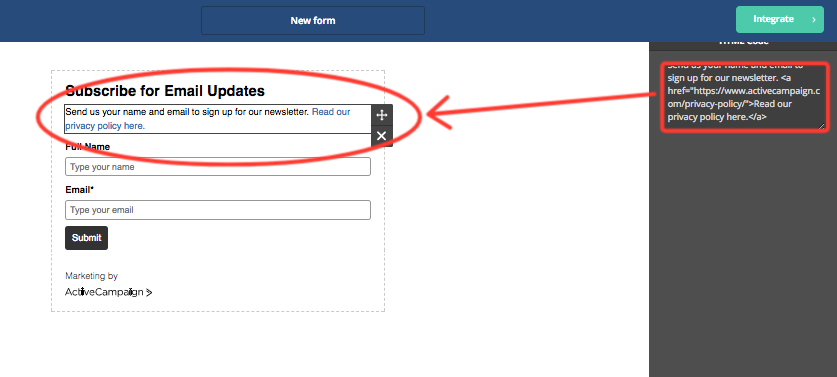
Insert line
Example code used:
<div style="height:10px;border-bottom:1px solid #CCCCCC">
</div>
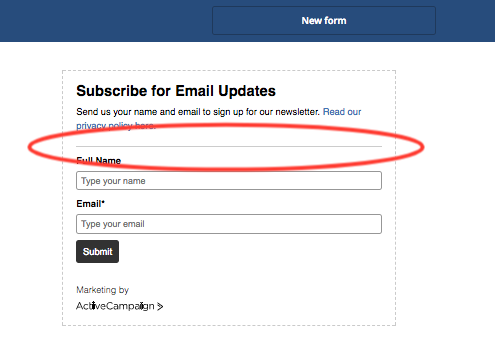
In this example, we used a separate HTML code block to create a line to insert between two form elements.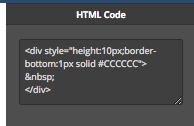
Create a bulleted list
Tags used <li> </li>
In this example, we wanted to list out what subscribers can expect to hear about when they sign up for our newsletter. This is how we set it up:
Learn more about the following: <li>Home energy check up</li><li>Solar consultation</li><li>Insulation</li>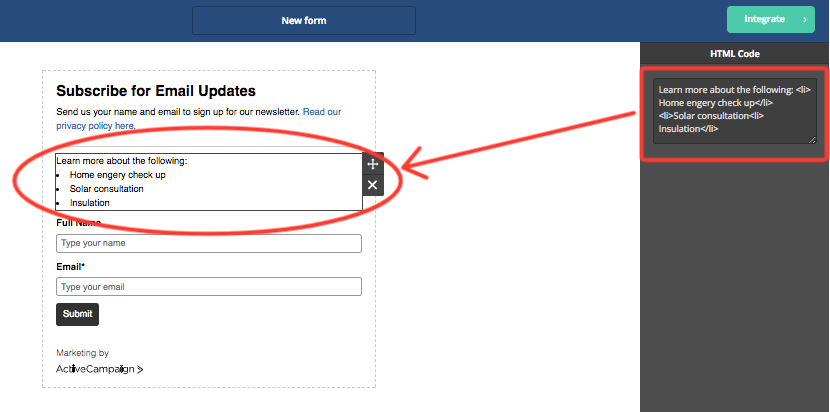
Add color to your text
Example code used:
<span style="color: #267ec2"; <p>Send us your name and email to sign up for our newsletter</p> </span>
In this example, we wanted to add color to the text in our HTML code block. The code used is found above.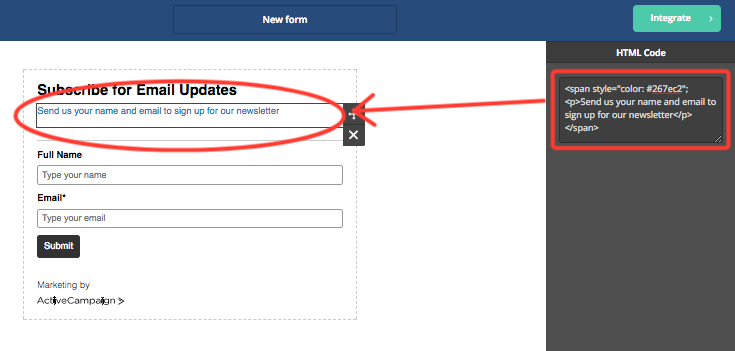
CSS
You can use the Custom CSS box and Inspector to modify visual elements of your form, such as adjusting the width of your submit button, adjusting font type and size, centering text in an element, changing the color of your text, and more. This option is located under the Style tab. All form types include the custom CSS box and Inspector.
To use the Custom CSS box and inspector, click the “Style” tab located on the top right of your form editor. Then click the inspector button and target the element you wish to add custom styling to by clicking it.
Adjust the width of a form element
You can either use a percentage or pixel to determine the width of an element. In this example, we’re going to adjust the width of the “Submit” button:
- Go to “Style” then click “Inspector.”
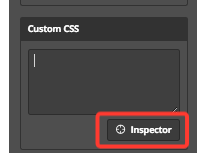
- Target the “Submit” button by clicking it.
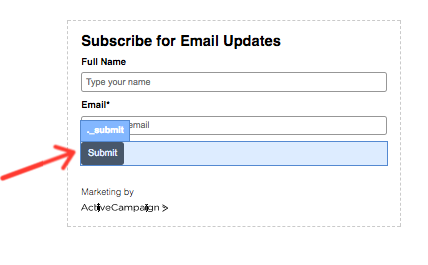
- In the CSS box, enter:width: numberpx; And replace “number” with your own number. In this example, we used 250px:
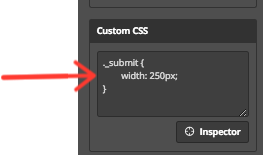
The submit button is now 250 pixel wide: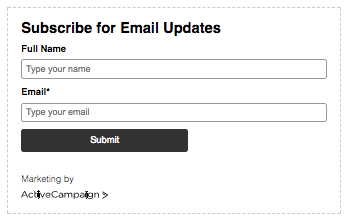
Adjust font type and size
You can use the CSS box to change the font for any element in your form. In this example, we’re going to modify the submit button by changing the font to Georgia and adjusting the font size to 25 pixel:
- Go to “Style” then click “Inspector.”

- Target the element by clicking it. In this example, we’re choosing the “Submit” button.

- In the CSS box, enter:font-size: 25px;font-family: Georgia !important:

The submit button’s font size and type is now adjusted: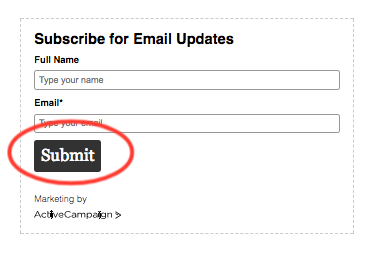
Center text using CSS
- Go to “Style” then click “Inspector.”

- Target the element containing the text you wish to center by clicking it
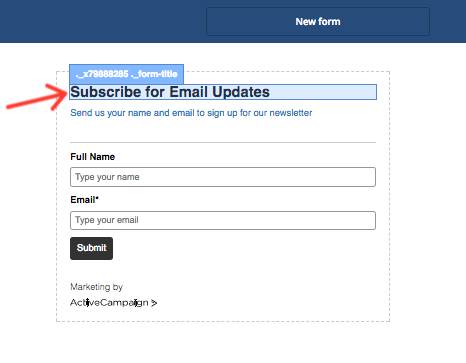
- In the CSS box, enter:text-align: center
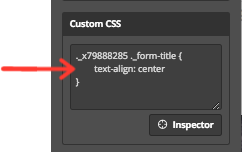
Your text is now centered: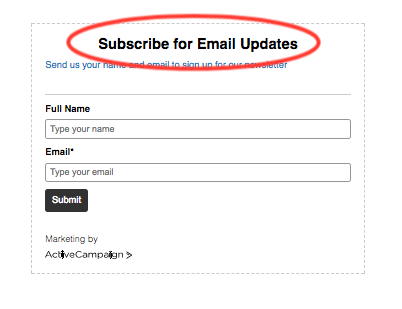
Add color with CSS
- Go to “Style” then click “Inspector.”

- Target the element containing the text you wish to change the color for by clicking it.
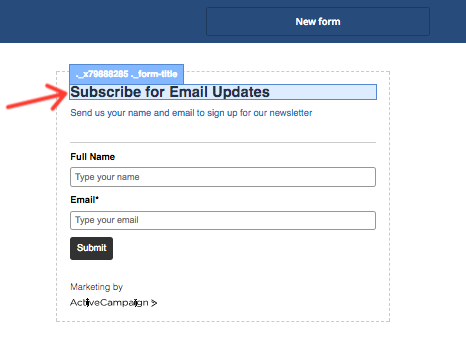
- In the CSS box, type: color:#hexcodeforcolor; and replace “number” with your own number. In this example, we used #f441b8
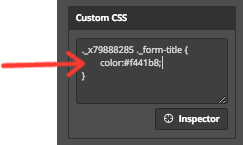
Your text now has color applied to it: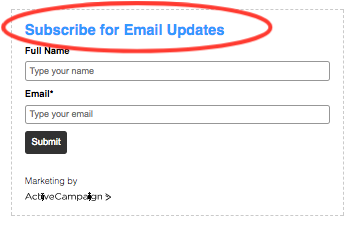
If you would like to learn more about CSS, there are several great resources out there such as this one.
Opmerkingen
0 opmerkingen
Artikel is gesloten voor opmerkingen.