What is Contact Scoring?
Contact Scoring is a way to evaluate and prioritize the quality of your leads. Scoring assigns a numerical value to your contacts. The higher the score, the better the lead.
Contacts are often scored on the basis of who they are (their "fit" for your product offering) and how engaged they are (usually determined by their behavior as they interact with your marketing assets).
Scores are created by aggregating points distributed by individual rules and automations. If the contact matches a rule, the rule’s points are awarded to the contact. The points distributed by individual rules are added together creating a score. For instance, if you have created a rule that assigns 10 points if a contact is in your metropolitan area and another rule that assigns 10 points if a contact has viewed your pricing information, a contact that matches both rules would have a score of 20 points.
Uses for Contact Scoring:
One of the most popular uses of scoring is to optimize your sales process so that your sales team is always focused on the highest quality leads. Scores can also be used to:
- Identify contacts who are a good match for your product or service, but not engaged, so that you can move them into nurturing automations specifically designed to increase interest and strengthen your relationship. In this way, scoring can be useful as a benchmark for how close a particular contact is to purchasing so that you can adjust your marketing accordingly.
- Identify the interests of your contacts. You can create rules and automations that give points for visiting product pages of your website and clicking product links in your emails. When they reach a threshold score, you can begin an automation that delivers targeted follow-up with content and offers related to that product.
- Measure the engagement of new customers. For instance, in the SaaS industry, if new customers aren’t interacting with your emails and website it may be an indication that additional contact is needed so they don’t cancel. If a new customer has a low engagement score you could move them into an automation that provides helpful resources and information intended to help them get more value out of the service and pique their interest in it by reselling the benefits.
- Create a predictive model. If your scoring system is accurate, you can use the leads in your funnel to forecast revenue.
- Alter your marketing on the basis of a contact's score so that you are more aggressive with highly engaged contacts who are a great fit. A contact who is highly engaged is probably ready to make a purchase decision and you may be able to be more aggressive with the frequency you contact them. In this way, you can adapt the length of your sales cycle on the basis of a lead's behavior.
Creating a contact score:
To create a contact score, navigate to the Contacts Overview by clicking “Contacts” in the top menu.
Click “Manage Scoring.” 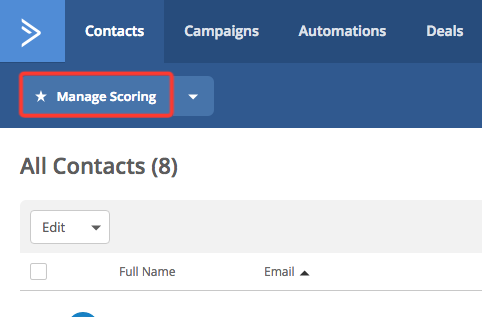
Click “Add New Score.”
Click “Contact score.” A contact score applies a score to a contact and a deal score applies a score to an open deal. You might want to use a contact score to identify your best leads and then create a deal. From then on, you might want to use a deal score to evaluate the deal. In this article, we are covering contact scoring, but deal scoring works the same way.
Give your score a descriptive name. For instance, “Engagement” and then a description that tells what the score's purpose is. You might say, “This score evaluates how contacts are interacting with various marketing assets.”
There are two ways to add points to a score. Static scoring is done with rules and dynamic scoring is done using automations. Rules are either “on” or “off” and they will only distribute points once. If you want to add points every time something happens, like a visit to your website or a click on a link in an email campaign, you'd create an automation that adds points each time that happens. You may want to create static rules for data and then use automations to distribute points based on behavior.
To create static scoring rules:
With your score open, click “Add New Rule:”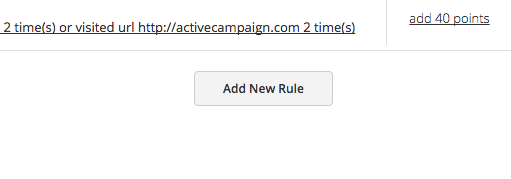
The Segment Builder will open. Click the left-most field to display a dropdown of categories you can use to create the conditions that distribute points.
For instance, you might want to create a rule that gives the contact 25 points if they are located in the United States. 
After you've set the conditions, click “Save:” 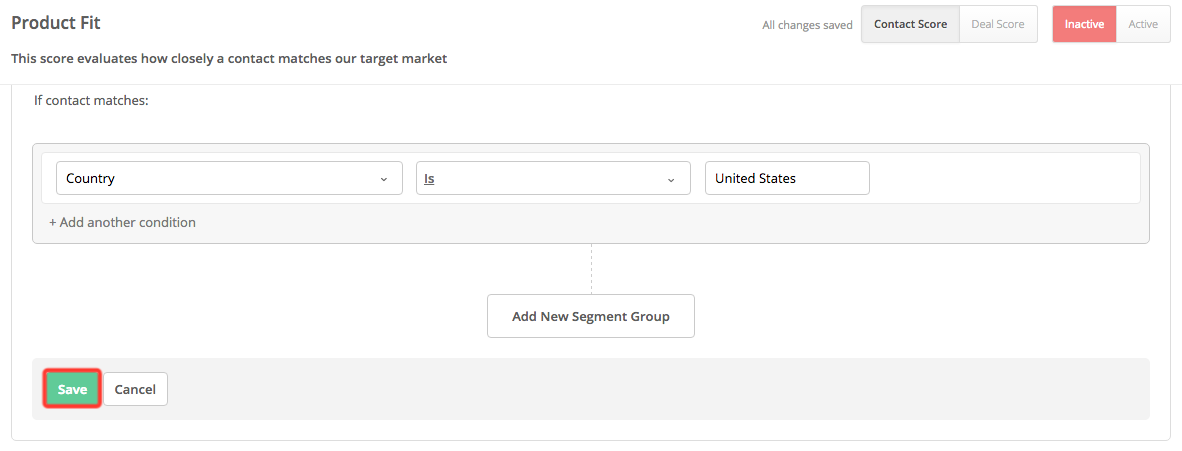
You'll see a column that says “add 10 points.” Click that line of text to modify the number of points that are distributed.
Note that you can create rules that add or subtract points. You might use negative points to subtract points if a contact has characteristics that are at odds with your target market. For instance, if there are countries you don't ship to, you could subtract points when a contact is in those countries.
The “points expire” setting allows you to remove the points after a period of time. This is especially useful for engagement scoring because a contact who was highly engaged three years ago would no longer be considered engaged. When you are scoring the characteristics of your target market, those are unlikely to change, so having the points expire “never” is probably fine.
When you've added and configured the rules of your score, click the “Inactive/Active” toggle to activate the score. Note that the score will need to be active before you can use it for dynamic scoring with automations.
To create automations for dynamic scoring:
To add or subtract points each time a behavior occurs you need to create an automation that runs multiple times.
In the top menu, click “Automations” to navigate to the Automations Overview.
Click “New Automation.”
Click “Start from Scratch” to create a new automation.
A modal window will appear with a variety of triggering conditions to start this automation. Each of these triggers represents a behavior you can use to add points to your score.
For example:
- You can remove points when a contact unsubscribes from a list using the “Unsubscribes” trigger.
- You can give points each time they open an email campaign using “Open/reads an email”
- You can distribute more points when they open a specific, important campaign using the “Opens/reads an email” trigger.
- You can distribute points each time a web page is visited using the “Web page is visited” trigger.
- You can add points when an event happens using the “Event is recorded” trigger.
- You can add points when a contact forwards your email campaign to another person using the “Forwardds and email” trigger.
- You can add points when they submit a form with specific selections using the “Field changes” trigger.
- You can add points when they click specific links in an email campaign using the “Clicks a link in email” trigger.
In this example, we will create a rule that gives 5 points each time they open an email campaign.
Click the “Opens/reads an email” trigger.
You are asked whether this trigger is looking at campaigns you've sent or one-to-one emails you've sent from the Contact Record or Deal Record. In this example, we are looking at campaigns, so click “When a contact opens a campaign.”
Here you can define which email campaign(s) should trigger the automation. In this example, we want to distribute points for every campaign that is opened so we'll leave it as “Any campaign” in “Any list.”
Change the “Runs” setting to “Multiple Times” by clicking “Once “ and selecting “Multiple Times” from the dropdown menu. This is an important setting because it is what allows the automation to distribute points over and over each time a campaign is opened.
Click “Add Start.”
Now we need to add an action that will adjust the score. Click the addition symbolthat appears below the trigger to open the Automation Action Modal: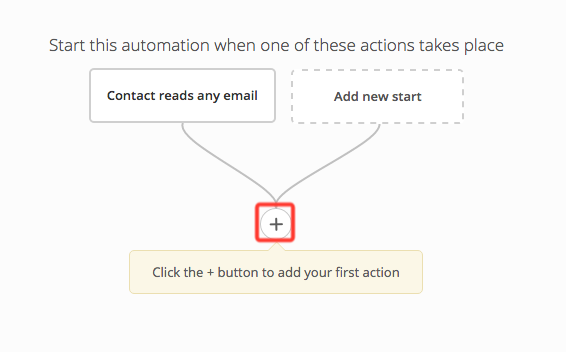
Under the “Contacts” category click “Adjust score:”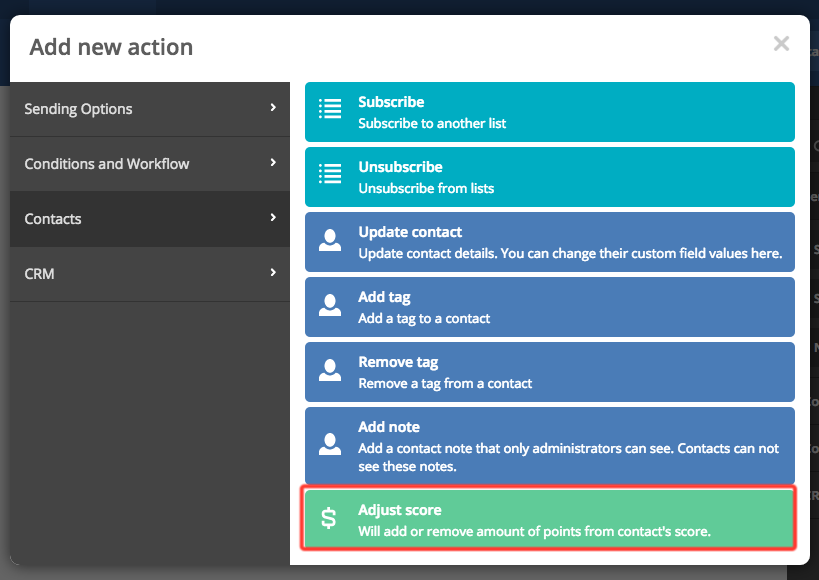
Select the score you want to adjust and then define whether the action should add or remove points from the score. Finally, set the number of points.
Use the “Expires” setting to define when the points should drop off the score. If you are scoring on engagement, you might want the points to drop off after a month or two so that the score always indicates your recently engaged contacts. 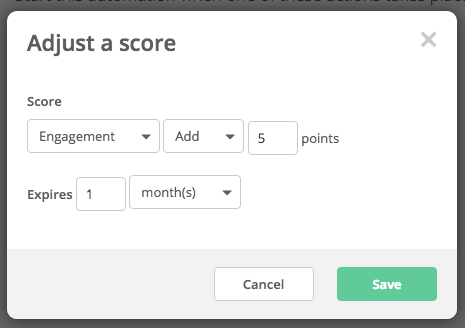
Click “Save.”
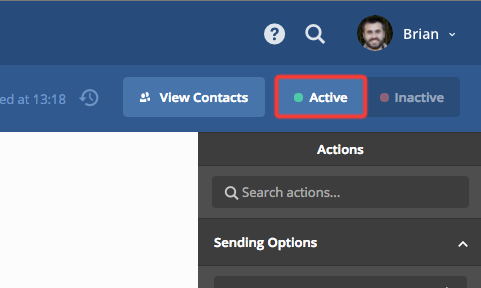
Click the “Active/Inactive” toggle to activate your automation.
Beginning automations based on scores:
You might want automations to begin when contacts reach a certain score. For instance, you could create an automation that automatically creates a deal record, assigns the deal, and creates a task to reach out to the primary contact when a contact reaches a score of 75 points or more. You can do this with the “Score changes” trigger.
Click “New Automation” then “Start from Scratch” and click “Okay.”
Click the “Score changes” trigger.
Select the score you want the trigger to use.
Define the score that should trigger the automation.
Set whether the automation should run one time or multiple times, then click “Add start.”
Opmerkingen
0 opmerkingen
Artikel is gesloten voor opmerkingen.