A split test involves creating different versions of a campaign and sending each version to a portion of your list. The version that performs best can be sent to the remainder of your list. Split testing also helps you learn what works best with your contacts so that you can improve your email marketing over time.
You can create up to five different versions of an email to test and choose how many contacts can receive each version. There are two types of split tests to choose from:
- Test different email subjects and/or from information
You can use up to five different email subject lines, copy for preheader text, and from information. - Test different email subjects, from information and/or email contents
You can use up to five different email subject lines, copy for preheader text, from information, and email contents.

How to create a split test a campaign
1. From the Campaign Overview page, click "New Campaign" in the top right corner of the application.
2. Type the name of the campaign into the field provided and click "Split Testing." Click "Next" to advance to the next screen.

3. On the List page, you can select which list to send the split test campaign to, and decide which split test type to use. You can choose from:
- Test different email subjects and/or from information
- Test different email subjects, from information and/or email contents
When finished, click "Next."

4. On the Design screen, you will choose a template to work with. To select the template, hover your mouse over it and click "Use This Design."

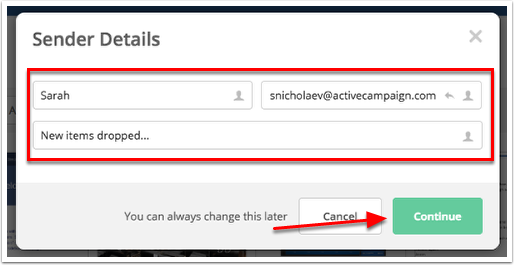
5. Type the sender details and subject line into the fields provided. Click "Continue."

6. Make any necessary modifications to the template.
If using "Test different email subjects and/or from information" split test type:
You can add up to five different versions of an email subject line, preheader text, and from information by clicking the Gear icon located on the upper right hand corner of the page, then clicking "Add Test."

To switch between different versions of the subject line, preheader text, and from information, click the Gear icon to open the Campaign Settings modal. Then click one of the test versions at the top of the modal.

If using "Test different email subjects, from information and/or email contents" split test type:
You can add up to five different versions of an email subject line, preheader text, from information, and email contents.
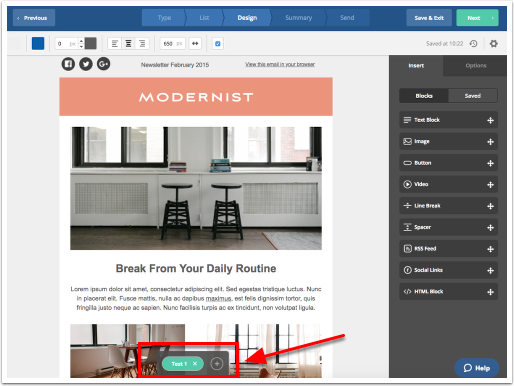
When you choose this option, you will be able create additional versions of your campaign by clicking the addition symbol at the bottom of the Campagin Designer:

The version you are currently editing will be highlighted in green.
To use different subject lines, preheader text, or from information, click the Gear icon located on the upper right corner of the Campaign Designer for each version of your campaign.
To switch between versions of your email, click any of the versions listed at the bottom of the campaign designer.

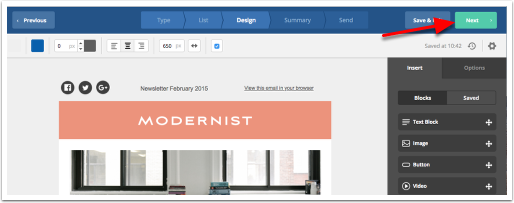
7. Once you have finished creating all versions of your split test campaign, click "Next" on the top right of the Campaign Designer to go to the Campaign Summary page.

8. On the Campaign Summary screen, you’ll have the opportunity to check your subject lines, preheader text, send test emails, preview your campaigns, and review a spam check score.
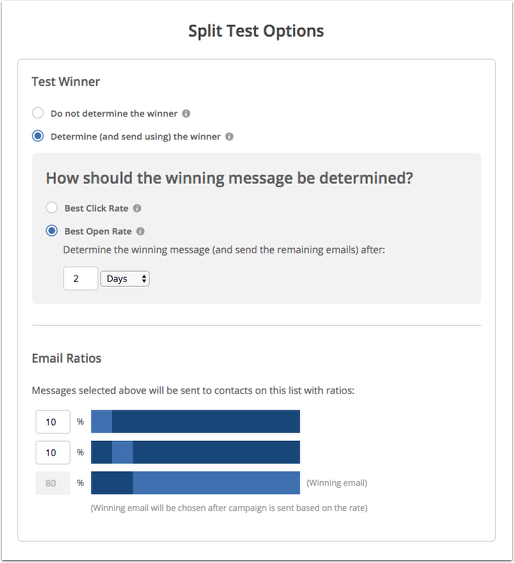
Toward the bottom of the screen you’ll see a section titled “Split Test Options.”
“Do not determine the winner” will send the campaigns to equal portions of your list. After the test is complete, you can log in and view the report to see which version was most effective.

“Determine (and send using) the winner” will display additional options to choose whether the open rate or click through rate should be used to determine the winner and how long the app should wait before making this determination. Most opens and clickthroughs will occur within two days of a campaign being sent so this is probably a good length of time for most campaigns but you can modify this value as needed.

The “Email Ratios” section allows you to specify what percentage of contacts should receive each version of your campaign. In most cases, you’ll want these to be equal numbers. The last value (how many contacts will receive the winning version) is automatically set based on how many contacts in your list are left after the test versions are sent.
When you’ve configured the split test, click “Send Now” to schedule your campaign for sending.

Opmerkingen
0 opmerkingen
Artikel is gesloten voor opmerkingen.